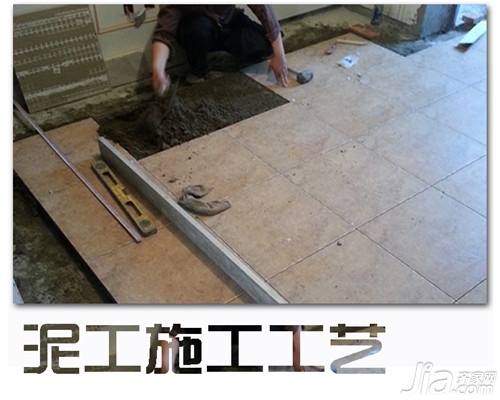
With the development of society nowadays, more and more people are renovating the house. Mason is an indispensable part of the decoration. What is the construction process of the mason ? The following small series briefly introduces the construction process under the mason .

1. Cement uses No. 425 cement, and mortar should be used with 1:2 cement mortar. The thickness of mortar should be 6~10mm. The cement mortar should be spread on the back of the wall tiles, and one wall should not be tiled to the top at a time to prevent falling. It is not allowed to use expired, agglomerated cement as adhesion material.
2. The tile should be washed with sand, and the particle size should be 20 mesh. The sand must be sieved to remove the impurities contained in the sand.
3. Ground (wall) surface leveling: Set horizontal lines, set relative elevations, and level ground (wall) surfaces based on relative elevations. 4. Before using the wall tiles, carefully check the dimensions (length, width, diagonal, flatness), color difference, and type of the wall tiles to prevent them from mixing. The varieties, specifications, colors and patterns of the wall tiles shall meet the requirements of the design and households, and the surface shall be free from scratches, missing corners and other quality defects.
5. The walls are soaked with water and the tiles are soaked in water for not less than 20 minutes. Before sticking, the tiles should be allowed to dry until they are dry. The tiles start from the door or the place where Party A needs them.
6. The reference point should be selected before posting to carry out the positioning and rowing of bricks. The non-complete bricks should be discharged at the secondary site or the female corner. Each wall should not have two columns of bricks.
7. Prior to posting, horizontal and vertical signs should be determined, and the footing should be well-matched and hanging. The surface of the brick wall should be flat, the seams should be straight, and the seam width should be uniform. The inner corner bricks should be pressed to the right, and the outer corners should be made with butt joints at an angle of 45°. At the protruding parts of the wall, the bricks should be cut and anastomosed. No bricks should be used together.
8. Do not use hard tools and tap the surface of the tile. Use only wood or rubber rakes.
9. For wood wall partition wall tiles, stencils should be hung on the wood substrate for plastering the base layer and then the wall tiles.
10. When wall tiles are pasted, the flatness is checked with a 1M ruler, the error is ≤ 1mm, 2M is checked by a ruler, the flatness is ≤ 2mm, the gap width between adjacent ones is ≤ 2mm, the straightness is ≤ 3mm, and the difference between the heights of the joints is ≤ 1mm.
11. Before inlaying the waistband tiles, check whether the dimensions are in line with the size of the wall tiles. The lower waistband bricks should not fall below 800mm above the ground, and the upper waistband tiles should not exceed 1800mm above the ground.
12. During the process of wall tile mounting, the mortar between the brick seams must be full and no emptying is allowed. Corner tiles must be replaced. After the uppermost layer of the wall tile is finished, apply cement mortar to fill up the upper gap to prevent cracking of the wall tile when the buckle is pulled and hit. 13. The bottom layer of the wall tiles should be left until the floor tiles are subsidized. When you purchase the wall tiles for the second time, you must bring bricks and choose the bricks of the same color.
14. The intersection of wall tiles and washstands, bathtubs, etc., should be subsidized after the washstands and bathtubs are installed. The opening of the wall opening of the cassette and the switch socket shall be tightly cut, and there shall be no phenomenon that the panel cannot cover the gap when the wall panel is attached to the switch panel.
15. When the wall tiles are affixed, the water outlet hole of the switch panel or the water pipe is encountered in the middle of the wall tile. The wall tile is not allowed to be disconnected and the boring hole of the cutting machine is used. The boring hole should be tight.
16. When wall tiles are affixed, the intersection with the door opening should be considered and the door line should be able to completely cover the gap.
17. Within 1 hour after the wall tiles have been plastered, dry joints (or white cement) must be used to clean the joints. Clear the joints before the acceptance and clean.
18. When affixing a glossy tile, you must use a towel or a soft cloth to wipe the surface. Do not use a clean ball.
19. Waterproof layer: Clean the base layer, apply waterproof coating twice, and close the water for 24 hours.
Information on the construction process of the mason was introduced here for everyone. I hope this article will help you. If you still have anything you don’t understand, you can follow our website and we’ll get back to you as soon as possible.
Mud-wood Stage Construction Installation Decoration Construction Knowledge Construction Bottom Construction Contract
Zhejiang Changxing Senda Bamboo & Wood Products Co.,Ltd , https://www.sendaflooring.com